
- 1 Introduction
- 1.1 About ZenTao
- 1.2 How to get support
- 2 How to Install ZenTao
- 2.1 Choose the best installation
- 2.2 ZenTao Cloud
- 2.3 One-click Installation Package for Windows (Recommended)
- 2.4 One-click Installation Package for Linux
- 2.5 Source Code Installation Package (for all Systems)
- 2.6 Set up Virtualbox for ZenTao
- 2.7 Softaculous service
- 3 Upgrade ZenTao
- 3.1 Choose Upgrade
- 3.2 Upgrade by source codes (General for all systems)
- 3.3 Upgrade for one-click installation package for windows users (xampp)
- 3.4 Upgrade for one-click installation package for Linux
- 4 Users and Groups
- 5 Simple Application
- 6 Basic Application
- 6.1 Basic Workflow
- 6.2 Agile and Scrum
- 6.3 ZenTao and Scrum
- 6.4 ZenTao Tutorial for Rookies
- 6.5 Create a Product
- 6.6 Create a Story
- 6.7 Create a Project
- 6.8 Confirm Stories
- 6.9 Decompose Tasks
- 6.10 Report a Bug
- 6.11 Manage Contacts
- 6.12 Customization
- 7 Advanced Application
- 7.1 Workflow
- 7.1.1 ZenTao Workflow
- 7.2 Personal management
- 7.2.1 My To-dos
- 7.2.2 My Task, Story and Bug
- 7.2.3 My Profile
- 7.3 Product Manager
- 7.3.1 Manage a Product
- 7.3.2 Create and Review a Story
- 7.3.3 Change and Review a Story
- 7.3.4 Story Status
- 7.3.5 Notes for Writing a Story
- 7.3.6 Product Module
- 7.3.7 Release Plan
- 7.3.8 Create a Release
- 7.3.9 Roadmap
- 7.3.10 Manage Documents
- 7.3.11 Product Meetings
- 7.3.12 Project Management, Presentation and Summary
- 7.3.13 Story Reports
- 7.4 Project Manager
- 7.5 Development Team
- 7.5.1 Project planning meeting and decompose tasks
- 7.5.2 Claim and update Tasks
- 7.5.3 Create a Build
- 7.5.4 Test Task
- 7.5.5 Resolve a Bug
- 7.5.6 Manage Documents
- 7.5.7 Confirm Bugs
- 7.6 Testing Team
- 7.6.1 Bug Management
- 7.6.2 Submit a Bug
- 7.6.3 Confim and Close a Bug
- 7.6.4 Activate a Bug
- 7.6.5 Find a Bug
- 7.6.6 Test Case
- 7.6.7 Create a Test Case
- 7.6.8 Manage a Test Task
- 7.6.9 Execute Cases and Report Bugs
- 7.6.10 Reports
- 8 Configuration
- 8.1 Maintain ZenTao
- 8.1.1 Initialize scripts
- 8.1.2 Back up ZenTao
- 8.1.3 Recover the deleted
- 8.1.4 Update Burndown charts
- 8.2 Deploy ZenTao
- 8.2.1 Guest Login
- 8.2.2 Cnfigure Email
- 8.2.3 Set Super Admin
- 8.2.4 Configure Static Access
- 8.2.5 Delete "zentao" from your address
- 8.2.6 Integrate ZenTao with SVN
- 8.2.7 Integrate ZenTao with Git
- 9 Custom Development
- 9.1 ZenTao Mechanism of Developing
- 9.2 ZenTao Directory
- 9.3 Modify files
- 9.4 ZenTao Database
- 9.5 Common Modules
- 9.6 Add features to navigation bar
- 9.7 Examples: Modify Language Prompt
- 9.8 Examples: set priority when creating bugs
- 9.9 Web Editor
- 9.10 Packaging Standards of ZenTao 1.1
- 10 Other Relevant Issues
- 10.1 About third-party code
- 10.2 ZenTao FAQ
- 10.3 How to Help ZenTao
- 10.4 ZenTao Business Service
- 10.5 Acknowledgement
One-click Installation Package for Windows (Recommended)
- 2015-09-09 16:14:35
- azalea
- 17881
- Last edited by xiying guan on 2018-12-06 10:08:46
In order to simplify installation in Windows, a one-click installation package for windows was made based on Xampp, a very famous AMP integrated runtime environment. The one-click installation package which is significantly simplifiedand integrates the control panel, independently developed by our team, is very convenient to use. For the one-click installation package, you can visit us at the following official website https://www.apachefriends.org/. (Notes: This is the official website of xampp. You don’t have to log in this website to download ZenTao one-click installation package.)
1. Installation
1.1 Download the latest integrated runtime environment for windows on our website ( .exe file).1.2 Double click to unzip it to a root directory, such as c:\xampp or d:\xampp. Make sure that it is unzipped into a root directory.
1.3 Go to the xampp folder and double click start. bat (right click it to run as an administrator and then start ZenTao.exe)and the control panel will shown as below,
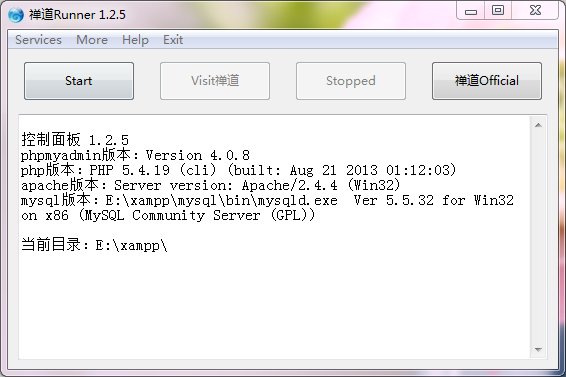
2. Start and login ZenTao
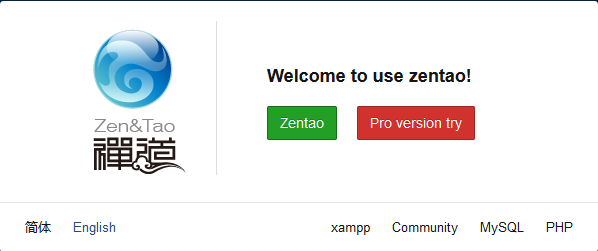
2.1 After starting the control panel, click “Launch ZenTao”, then the system will automatically start Apache and MySQL.2.2 After successfully lauching it, click “Access ZenTao”, then you will open the home page of ZenTao.
3. About the password
3.1 The login account for ZenTao Project Management Software is admin and its password is 123456. Please change your password as soon as possible after you log in.3.2 The admin account for mysql is root with no password. (If you change the password for your root account, make sure to change the database password in the directory zentao/config/my.php.)
3.3 The program for database management is phpmyadmin. You can only access to the database through the machines installed with ZenTao due to safety. Access through other machines will not be allowed. (Please visit 127.0.0.1 through your ZenTao server and then click Database Management.)
4. About the Environment
4.1 The address for ZenTao is http:// ip address of the machines installed with ZenTao: port number/zentao/. If the ip address is changed to the actual ip address of machines installed with ZenTao, the port number should also be changed to the actual number.4.2 The control panel will automatically instal Apache and Mysql, and the service names are apachezt and mysqlzt.
4.3 The environment is simplified based on xampp.
5. What if the Control Panel is not working...
You can also use the control scripts if you can’t start ZenTao through the control panel.5.1 Switch to directory xampp \ service.
5.2 Double click install.bat and the system will automatically install apache and mysql and start ZenTao.
5.3 After installation, port.apache and port.mysql will be created to record the port numbers of apache and mysql. If you want to change the port, you can delete the two files and run install.bat again.