
- 1 Introduction
- 1.1 About ZenTao
- 1.2 How to get support
- 2 How to Install ZenTao
- 2.1 Choose the best installation
- 2.2 ZenTao Cloud
- 2.3 One-click Installation Package for Windows (Recommended)
- 2.4 One-click Installation Package for Linux
- 2.5 Source Code Installation Package (for all Systems)
- 2.6 Set up Virtualbox for ZenTao
- 2.7 Softaculous service
- 3 Upgrade ZenTao
- 3.1 Choose Upgrade
- 3.2 Upgrade by source codes (General for all systems)
- 3.3 Upgrade for one-click installation package for windows users (xampp)
- 3.4 Upgrade for one-click installation package for Linux
- 4 Users and Groups
- 5 Simple Application
- 6 Basic Application
- 6.1 Basic Workflow
- 6.2 Agile and Scrum
- 6.3 ZenTao and Scrum
- 6.4 ZenTao Tutorial for Rookies
- 6.5 Create a Product
- 6.6 Create a Story
- 6.7 Create a Project
- 6.8 Confirm Stories
- 6.9 Decompose Tasks
- 6.10 Report a Bug
- 6.11 Manage Contacts
- 6.12 Customization
- 7 Advanced Application
- 7.1 Workflow
- 7.1.1 ZenTao Workflow
- 7.2 Personal management
- 7.2.1 My To-dos
- 7.2.2 My Task, Story and Bug
- 7.2.3 My Profile
- 7.3 Product Manager
- 7.3.1 Manage a Product
- 7.3.2 Create and Review a Story
- 7.3.3 Change and Review a Story
- 7.3.4 Story Status
- 7.3.5 Notes for Writing a Story
- 7.3.6 Product Module
- 7.3.7 Release Plan
- 7.3.8 Create a Release
- 7.3.9 Roadmap
- 7.3.10 Manage Documents
- 7.3.11 Product Meetings
- 7.3.12 Project Management, Presentation and Summary
- 7.3.13 Story Reports
- 7.4 Project Manager
- 7.5 Development Team
- 7.5.1 Project planning meeting and decompose tasks
- 7.5.2 Claim and update Tasks
- 7.5.3 Create a Build
- 7.5.4 Test Task
- 7.5.5 Resolve a Bug
- 7.5.6 Manage Documents
- 7.5.7 Confirm Bugs
- 7.6 Testing Team
- 7.6.1 Bug Management
- 7.6.2 Submit a Bug
- 7.6.3 Confim and Close a Bug
- 7.6.4 Activate a Bug
- 7.6.5 Find a Bug
- 7.6.6 Test Case
- 7.6.7 Create a Test Case
- 7.6.8 Manage a Test Task
- 7.6.9 Execute Cases and Report Bugs
- 7.6.10 Reports
- 8 Configuration
- 8.1 Maintain ZenTao
- 8.1.1 Initialize scripts
- 8.1.2 Back up ZenTao
- 8.1.3 Recover the deleted
- 8.1.4 Update Burndown charts
- 8.2 Deploy ZenTao
- 8.2.1 Guest Login
- 8.2.2 Cnfigure Email
- 8.2.3 Set Super Admin
- 8.2.4 Configure Static Access
- 8.2.5 Delete "zentao" from your address
- 8.2.6 Integrate ZenTao with SVN
- 8.2.7 Integrate ZenTao with Git
- 9 Custom Development
- 9.1 ZenTao Mechanism of Developing
- 9.2 ZenTao Directory
- 9.3 Modify files
- 9.4 ZenTao Database
- 9.5 Common Modules
- 9.6 Add features to navigation bar
- 9.7 Examples: Modify Language Prompt
- 9.8 Examples: set priority when creating bugs
- 9.9 Web Editor
- 9.10 Packaging Standards of ZenTao 1.1
- 10 Other Relevant Issues
- 10.1 About third-party code
- 10.2 ZenTao FAQ
- 10.3 How to Help ZenTao
- 10.4 ZenTao Business Service
- 10.5 Acknowledgement
Project and Task Management
- 2015-09-10 14:08:12
- azalea
- 2448
- Last edited by tengfei on 2016-12-14 10:41:59
You may be surprised at the various features on the interface of ZenTao and think it is too complicated. We would like to say that ZenTao is determined to be a professional collaborative management software and provide integrated task management instead of simple task management. Project management is complicated by itself, so the features provided in ZenTao areall must-have. But this doesn’t mean that you have to go by ZenTao’s workflow. You can customize your workflow according to your actual situations. Now let’s see the simple application of ZenTao.
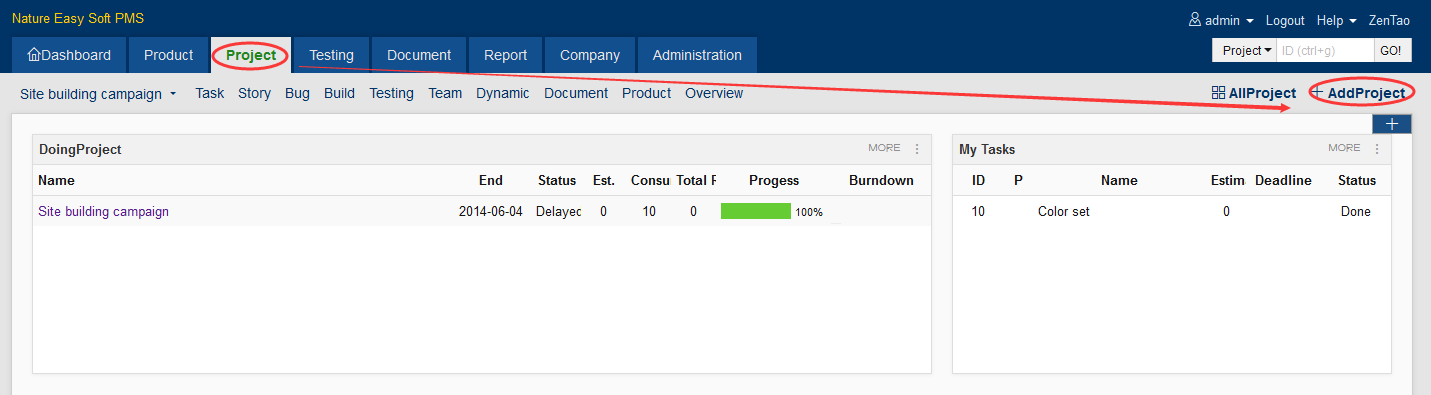
1. Create a Project
1.1 Click Project and click Add Project.
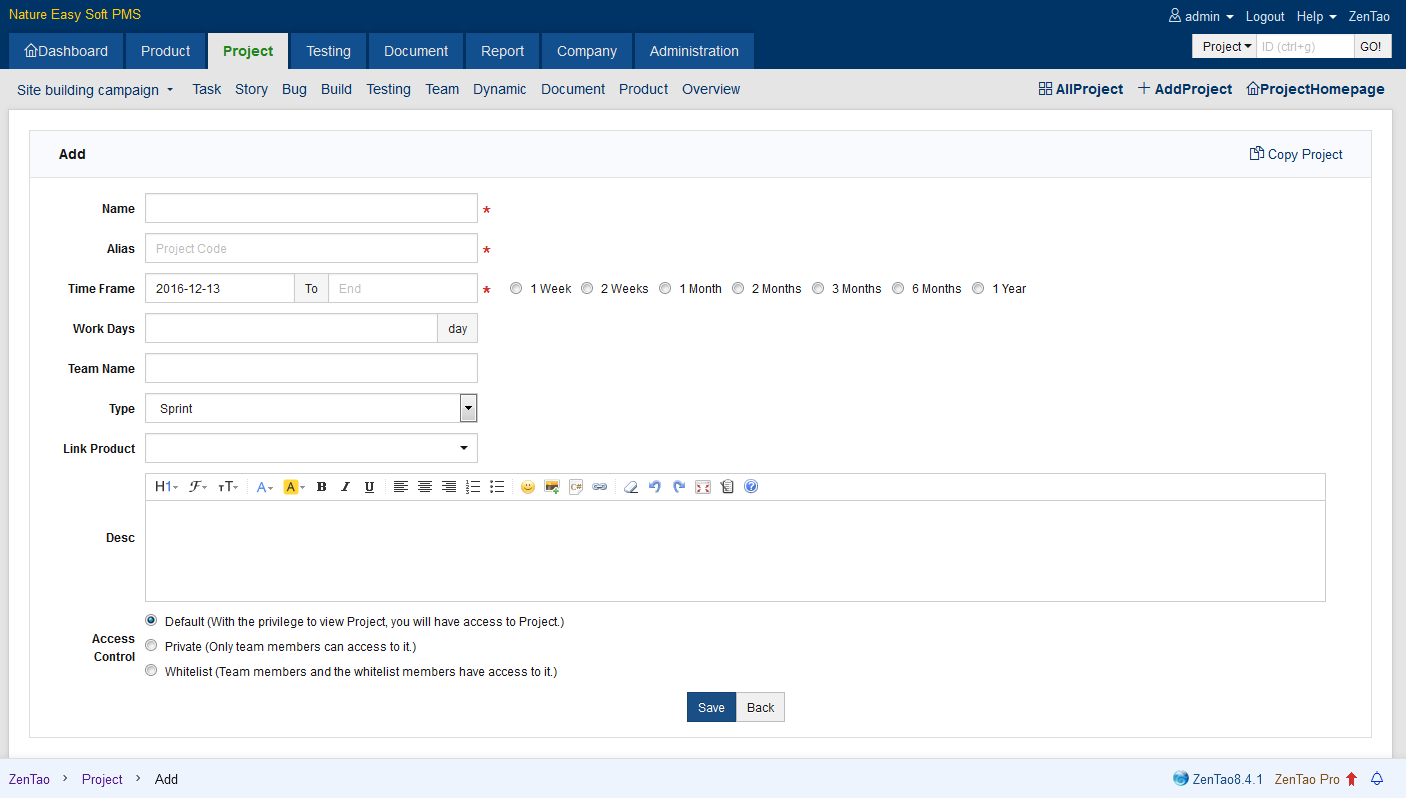
1.2 The page to add a project will show. You can define the fields such as project name, alias, start and end date, workdays available, team name, etc. As for Link Product, it can be left empty or multi-selected.
2. Set up Teams
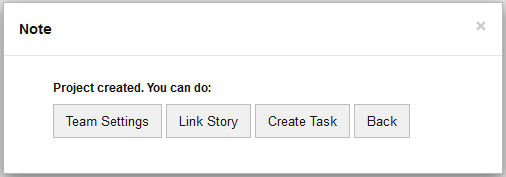
2.1 Click the Save and a message will notify you that the project is created. Then you can set up teams.
2.2 Or you can manage the project teams from the menu by clicking Project->Team.
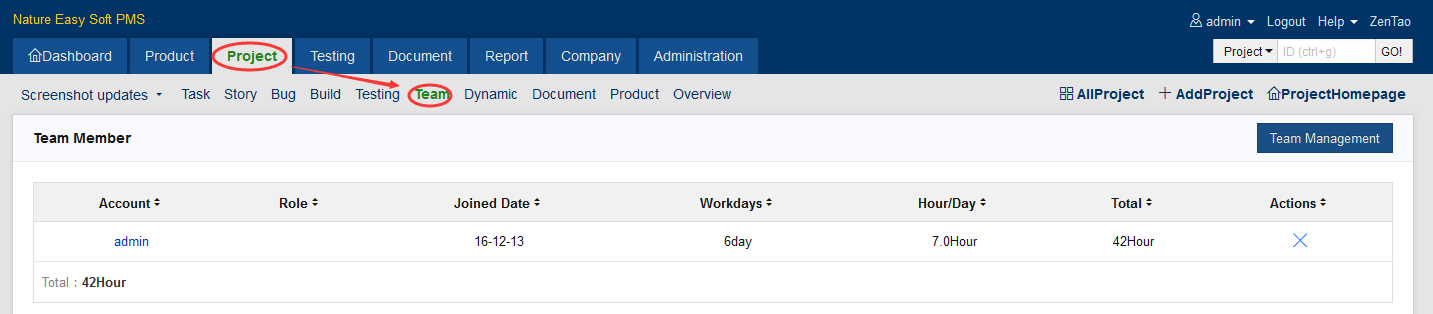
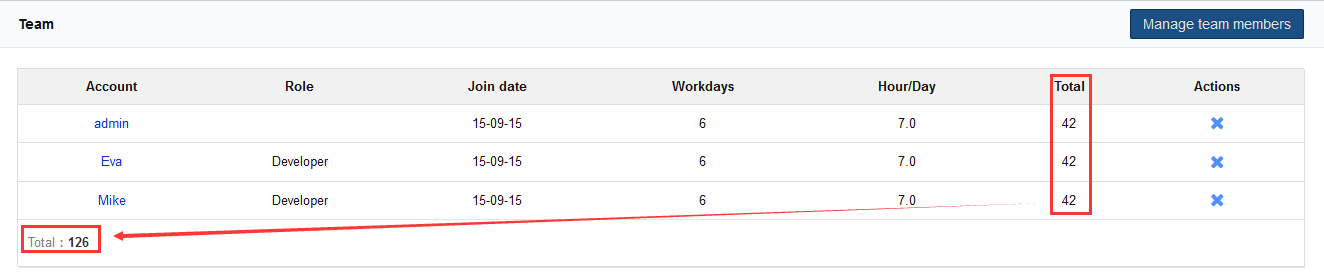
2.3 After all is set up, ZenTao will automatically calculate the total man-hour in the project.
3. Decompose Tasks
3.1 After setting up the teams, the next is to create tasks. Click Project->Task->Create.
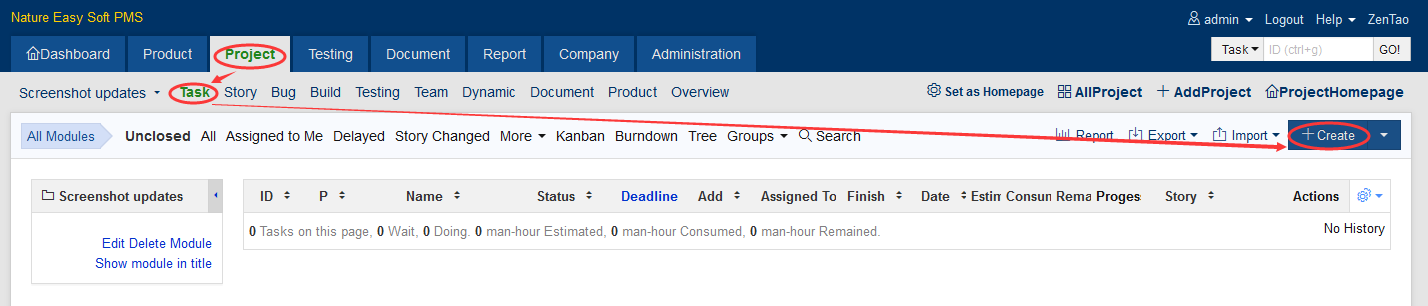
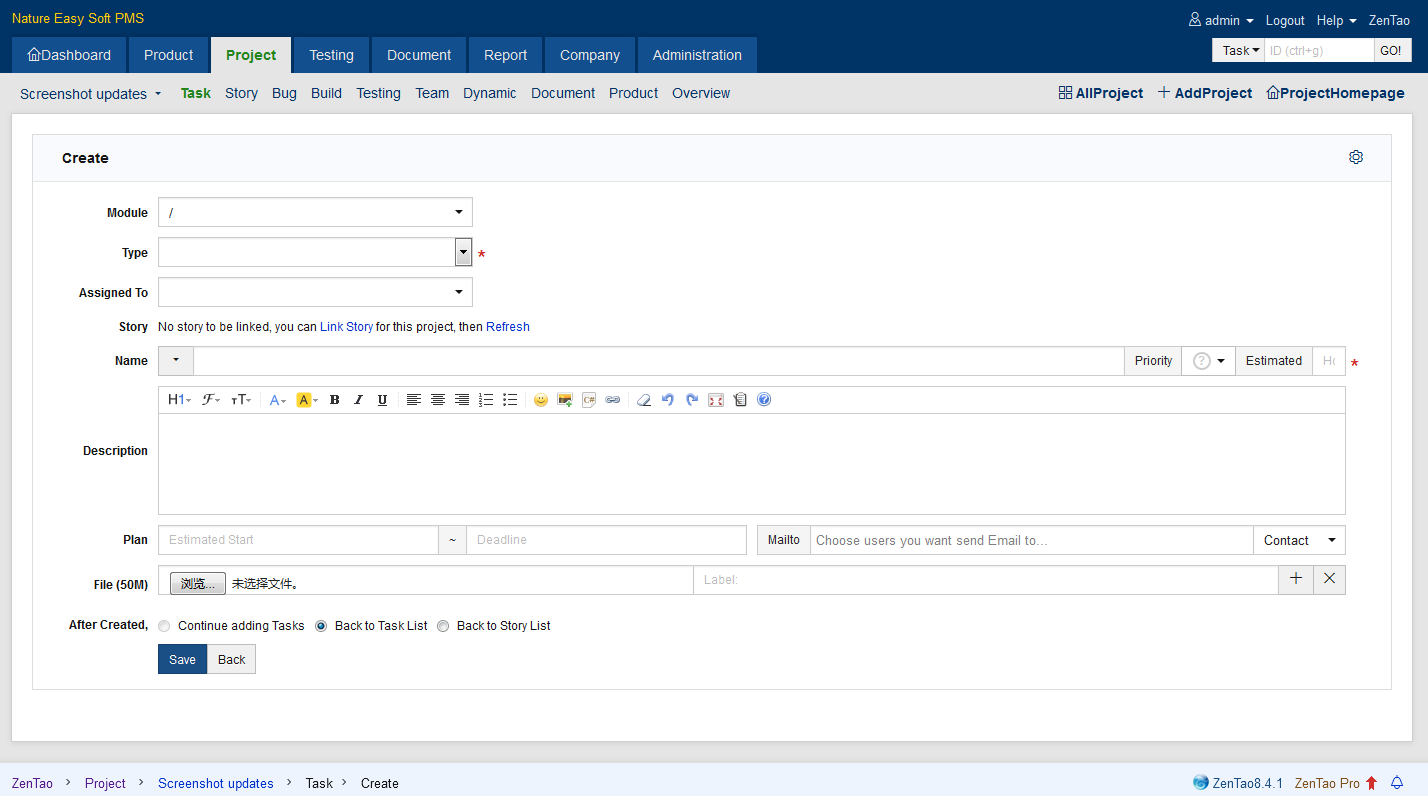
3.2 The page of creating a task will show.
- When you are creating tasks, you should assign Read privilege to members of the project teams.
- The initials of the name lists can be used to screen users quickly.
- Priority of the tasks and estimated man-hour (unit hours) need to be set up.
- If a task must be finished before a certain date, you can also set up the deadlines.
- You can upload attachments.
4. Update Tasks
When all the tasks are decomposed, everyone knows what they are going to do. Once the project is started, the team members will update the status of their tasks.4.1 Task List
On the page of Tasks, you can see all the tasks listed in ZenTao. You can easily filter the tasks by various labels. Click the link of certain task list for details.

4.2 Task Details
On this page, you can find all the details about the task, including previous modification records. There are also Actions for your to edit the task.
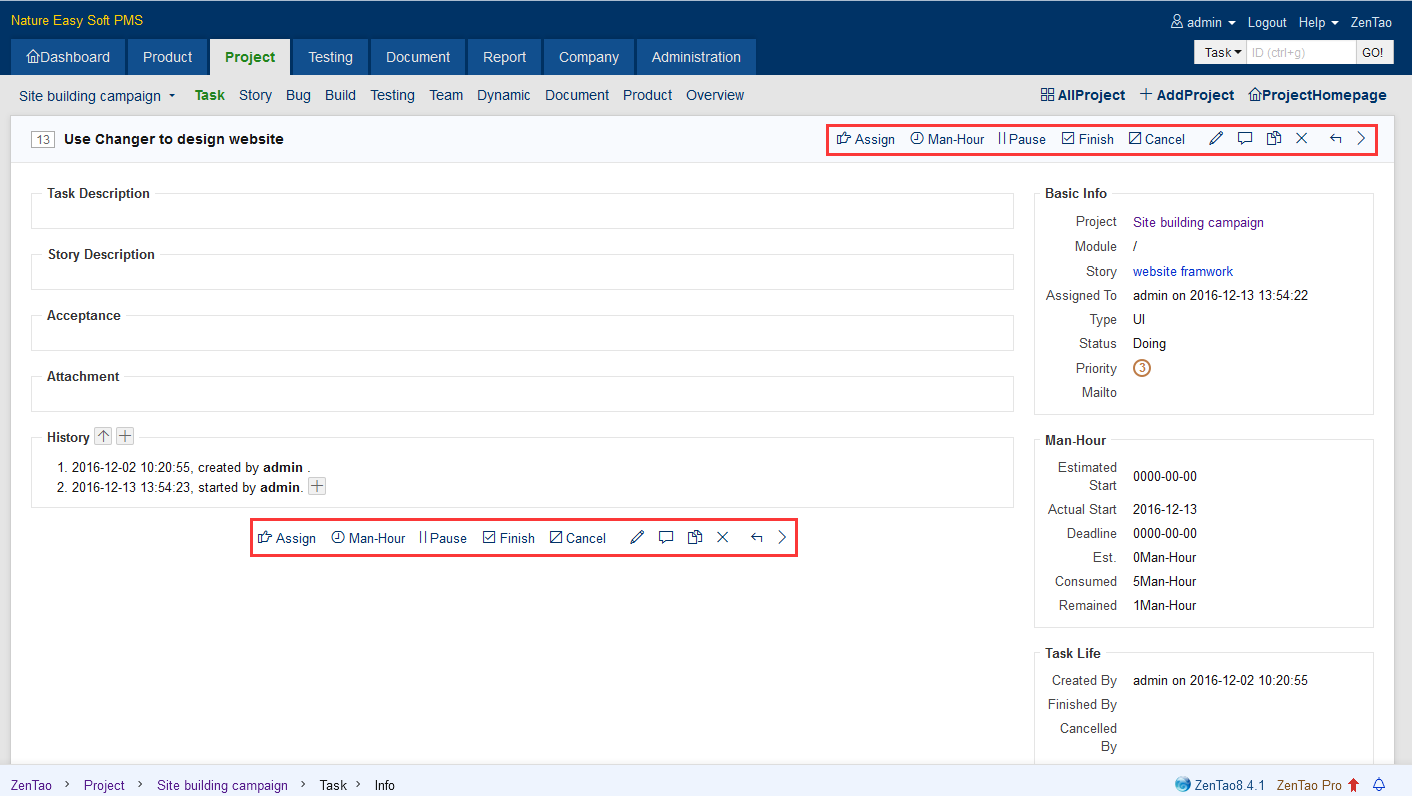
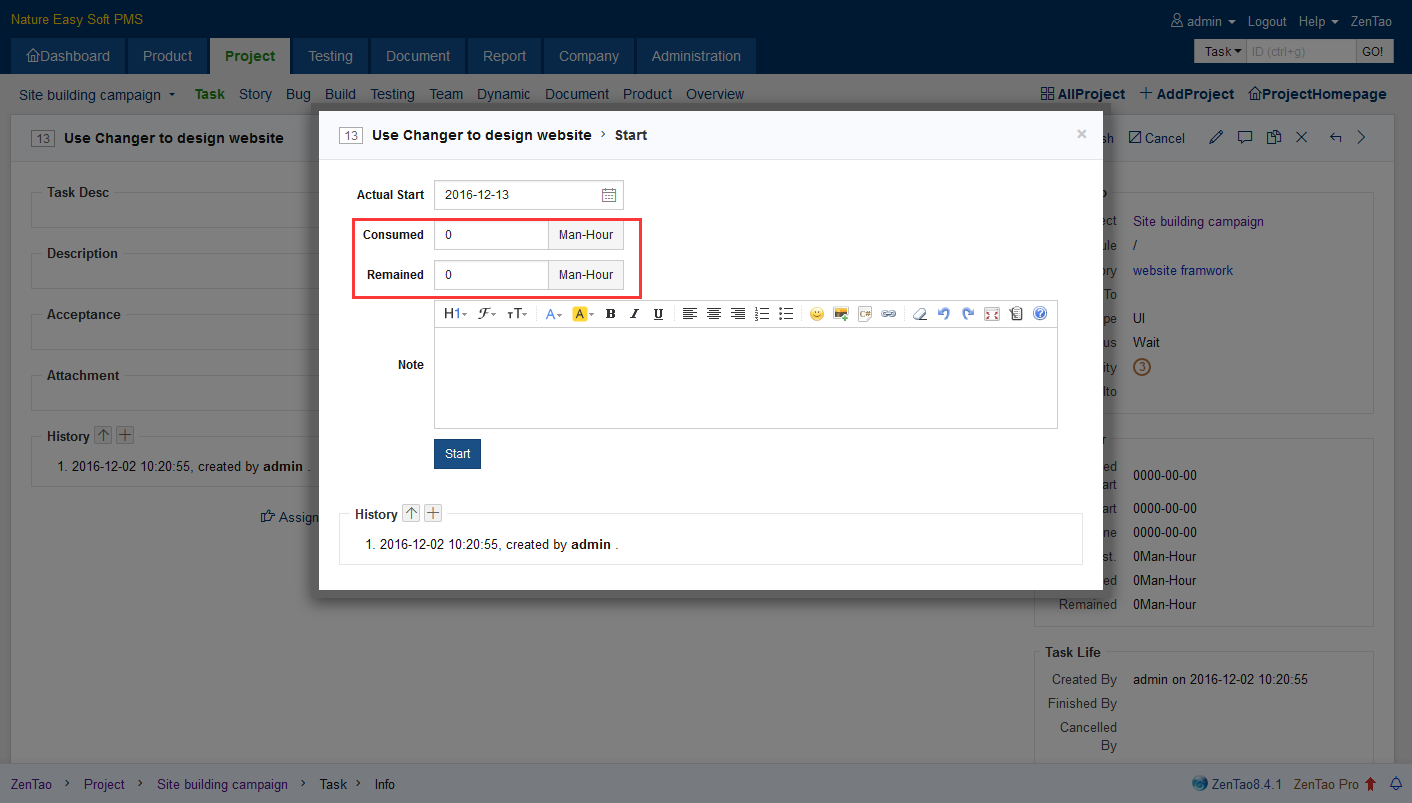
4.3 Start the Task
Click Start to start doing the task. When you start a task, you can set up the time consumed and estimated time left (man-hour).
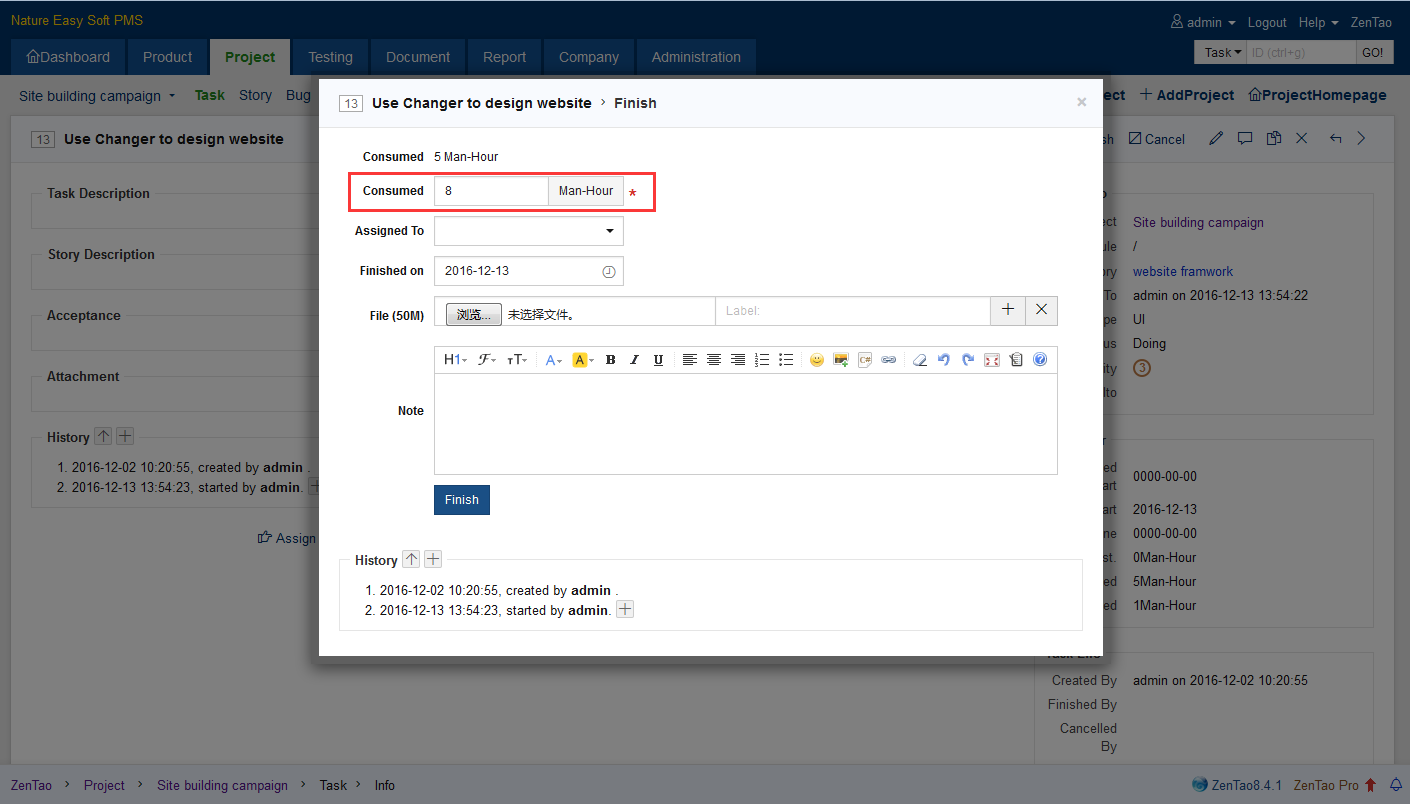
4.4 Finish a Task
Click Finish to finish a task. When the task is completed, you should record the time consumed.
5. Accept and Close a Task
When the task is completed, it will be automatically assigned to the one who created it. Then assignee can accept weather the task is completed or not. If completed, the assignee will close the task. The task is finally done.