- 1 Introduction
- 1.1 About ZenTao
- 1.2 How to get support
- 2 How to Install ZenTao
- 2.1 Choose the best installation
- 2.2 ZenTao Cloud
- 2.3 One-click Installation Package for Windows (Recommended)
- 2.4 One-click Installation Package for Linux
- 2.5 Source Code Installation Package (for all Systems)
- 2.6 Set up Virtualbox for ZenTao
- 2.7 Softaculous service
- 3 Upgrade ZenTao
- 3.1 Choose Upgrade
- 3.2 Upgrade by source codes (General for all systems)
- 3.3 Upgrade for one-click installation package for windows users (xampp)
- 3.4 Upgrade for one-click installation package for Linux
- 4 Users and Groups
- 5 Simple Application
- 6 Basic Application
- 6.1 Basic Workflow
- 6.2 Agile and Scrum
- 6.3 ZenTao and Scrum
- 6.4 ZenTao Tutorial for Rookies
- 6.5 Create a Product
- 6.6 Create a Story
- 6.7 Create a Project
- 6.8 Confirm Stories
- 6.9 Decompose Tasks
- 6.10 Report a Bug
- 6.11 Manage Contacts
- 6.12 Customization
- 7 Advanced Application
- 7.1 Workflow
- 7.1.1 ZenTao Workflow
- 7.2 Personal management
- 7.2.1 My To-dos
- 7.2.2 My Task, Story and Bug
- 7.2.3 My Profile
- 7.3 Product Manager
- 7.3.1 Manage a Product
- 7.3.2 Create and Review a Story
- 7.3.3 Change and Review a Story
- 7.3.4 Story Status
- 7.3.5 Notes for Writing a Story
- 7.3.6 Product Module
- 7.3.7 Release Plan
- 7.3.8 Create a Release
- 7.3.9 Roadmap
- 7.3.10 Manage Documents
- 7.3.11 Product Meetings
- 7.3.12 Project Management, Presentation and Summary
- 7.3.13 Story Reports
- 7.4 Project Manager
- 7.5 Development Team
- 7.5.1 Project planning meeting and decompose tasks
- 7.5.2 Claim and update Tasks
- 7.5.3 Create a Build
- 7.5.4 Test Task
- 7.5.5 Resolve a Bug
- 7.5.6 Manage Documents
- 7.5.7 Confirm Bugs
- 7.6 Testing Team
- 7.6.1 Bug Management
- 7.6.2 Submit a Bug
- 7.6.3 Confim and Close a Bug
- 7.6.4 Activate a Bug
- 7.6.5 Find a Bug
- 7.6.6 Test Case
- 7.6.7 Create a Test Case
- 7.6.8 Manage a Test Task
- 7.6.9 Execute Cases and Report Bugs
- 7.6.10 Reports
- 8 Configuration
- 8.1 Maintain ZenTao
- 8.1.1 Initialize scripts
- 8.1.2 Back up ZenTao
- 8.1.3 Recover the deleted
- 8.1.4 Update Burndown charts
- 8.2 Deploy ZenTao
- 8.2.1 Guest Login
- 8.2.2 Cnfigure Email
- 8.2.3 Set Super Admin
- 8.2.4 Configure Static Access
- 8.2.5 Delete "zentao" from your address
- 8.2.6 Integrate ZenTao with SVN
- 8.2.7 Integrate ZenTao with Git
- 9 Custom Development
- 9.1 ZenTao Mechanism of Developing
- 9.2 ZenTao Directory
- 9.3 Modify files
- 9.4 ZenTao Database
- 9.5 Common Modules
- 9.6 Add features to navigation bar
- 9.7 Examples: Modify Language Prompt
- 9.8 Examples: set priority when creating bugs
- 9.9 Web Editor
- 9.10 Packaging Standards of ZenTao 1.1
- 10 Other Relevant Issues
- 10.1 About third-party code
- 10.2 ZenTao FAQ
- 10.3 How to Help ZenTao
- 10.4 ZenTao Business Service
- 10.5 Acknowledgement
Individual Task Management
- 2015-09-10 14:08:12
- azalea
- 2448
- Last edited by tengfei on 2016-12-14 14:43:40
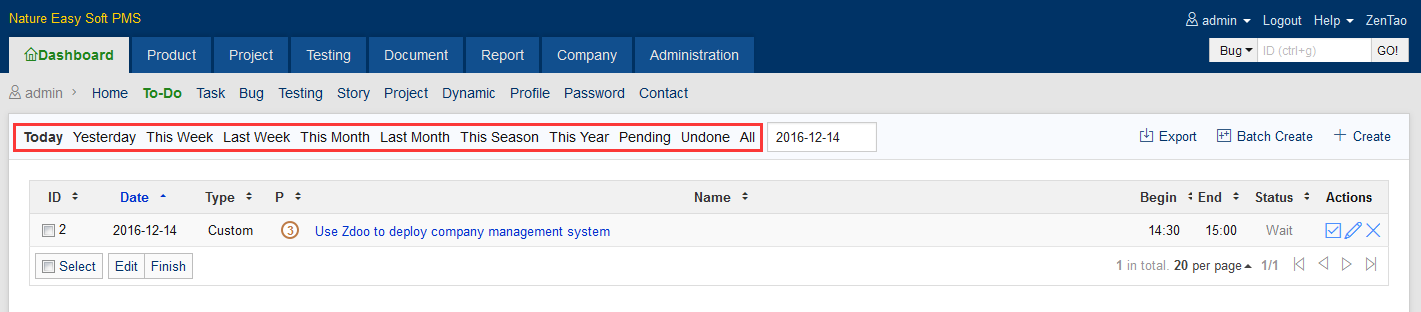
Now let’s have a look at how to manage individual work by ZenTao.
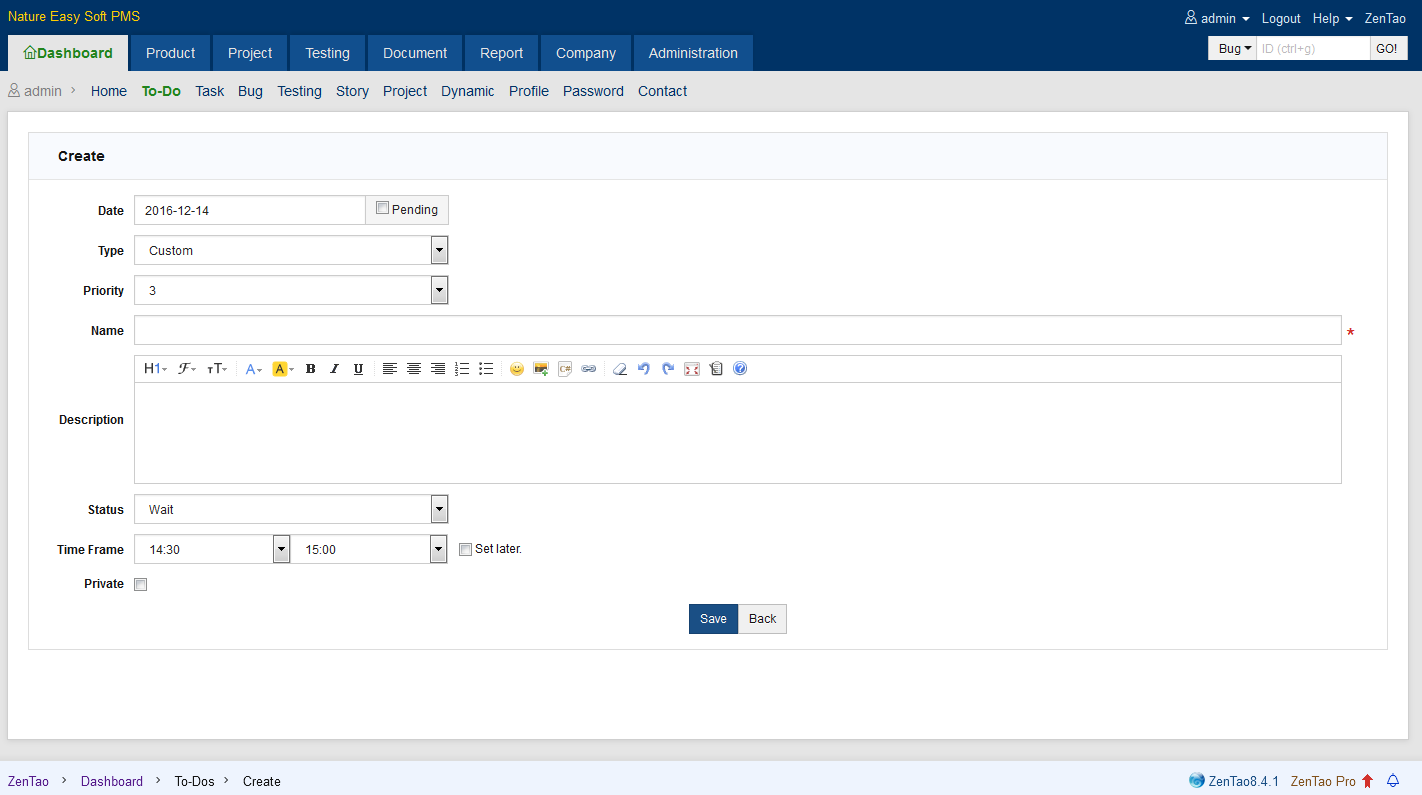
1. Create To-Dos
Go to Dashboard-> To-Do and click Create.

The page of creating a To-Do will show. You can set the time frame or leave it for later. If you don't want others to see this To-Do, check Private box.
2. View To-Dos
ZenTao has a variety of labels as filters to search the To-Do you want.